Clara’s room always had to feel special.
We first ‘decorated’ the room when we moved in two and a half years ago – and by decorate I mean we ripped out the bleach stained carpet with holes in and replaced it with a high quality neutral carpet. We sanded back the Oxford United themed bright yellow and blue woodwork and painted it white. And we covered up the dark blue walls with a soft pale grey.
When we found out we were expecting a baby, I was so excited to get to work planning a nursery. We didn’t found out the gender of our baby, so we knew we needed to stay neutral, but my gut feeling was this was a BOY (sorry Clara!). So we kept the room wall colour, Laura Ashley Pale Dove Grey, and decided to accessorise.
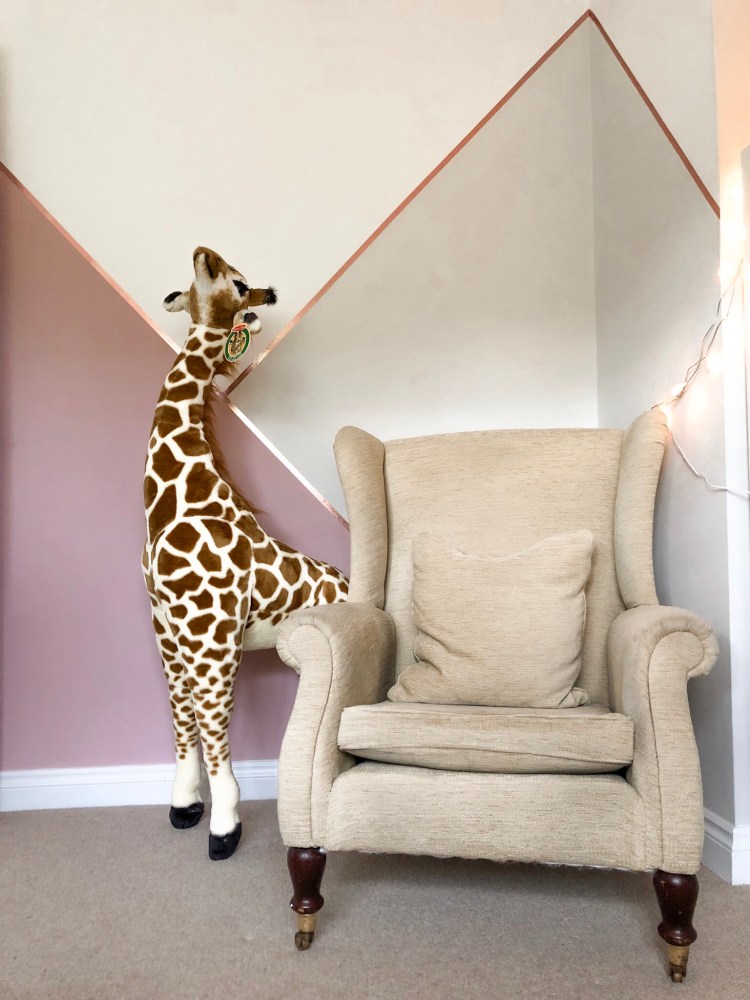
Somehow, giraffes became a bit of a thing. We had a beautiful watercolour Giraffe canvas, a few safari themed soft furnishings including a giraffe cushion, and mustard yellow floor length curtains and we opted for solid rich wood furniture. The room was classic but with a modern twist. Perfect for any child, but I’ll admit my vision was slightly skewed by the fact I was convinced we were having a little baby boy.
As it turns out, we ended up with a beautiful baby girl. Our little Clara.
Obviously the first six months weren’t exactly what we expected. But when we knew our little girl was going to be coming home, I knew I had to make her room perfect. I had to change what we had planned for baby – our miracle Clara couldn’t simply slot into the simple room we had styled. This girl deserved much more than that! And I was ready to go girly!
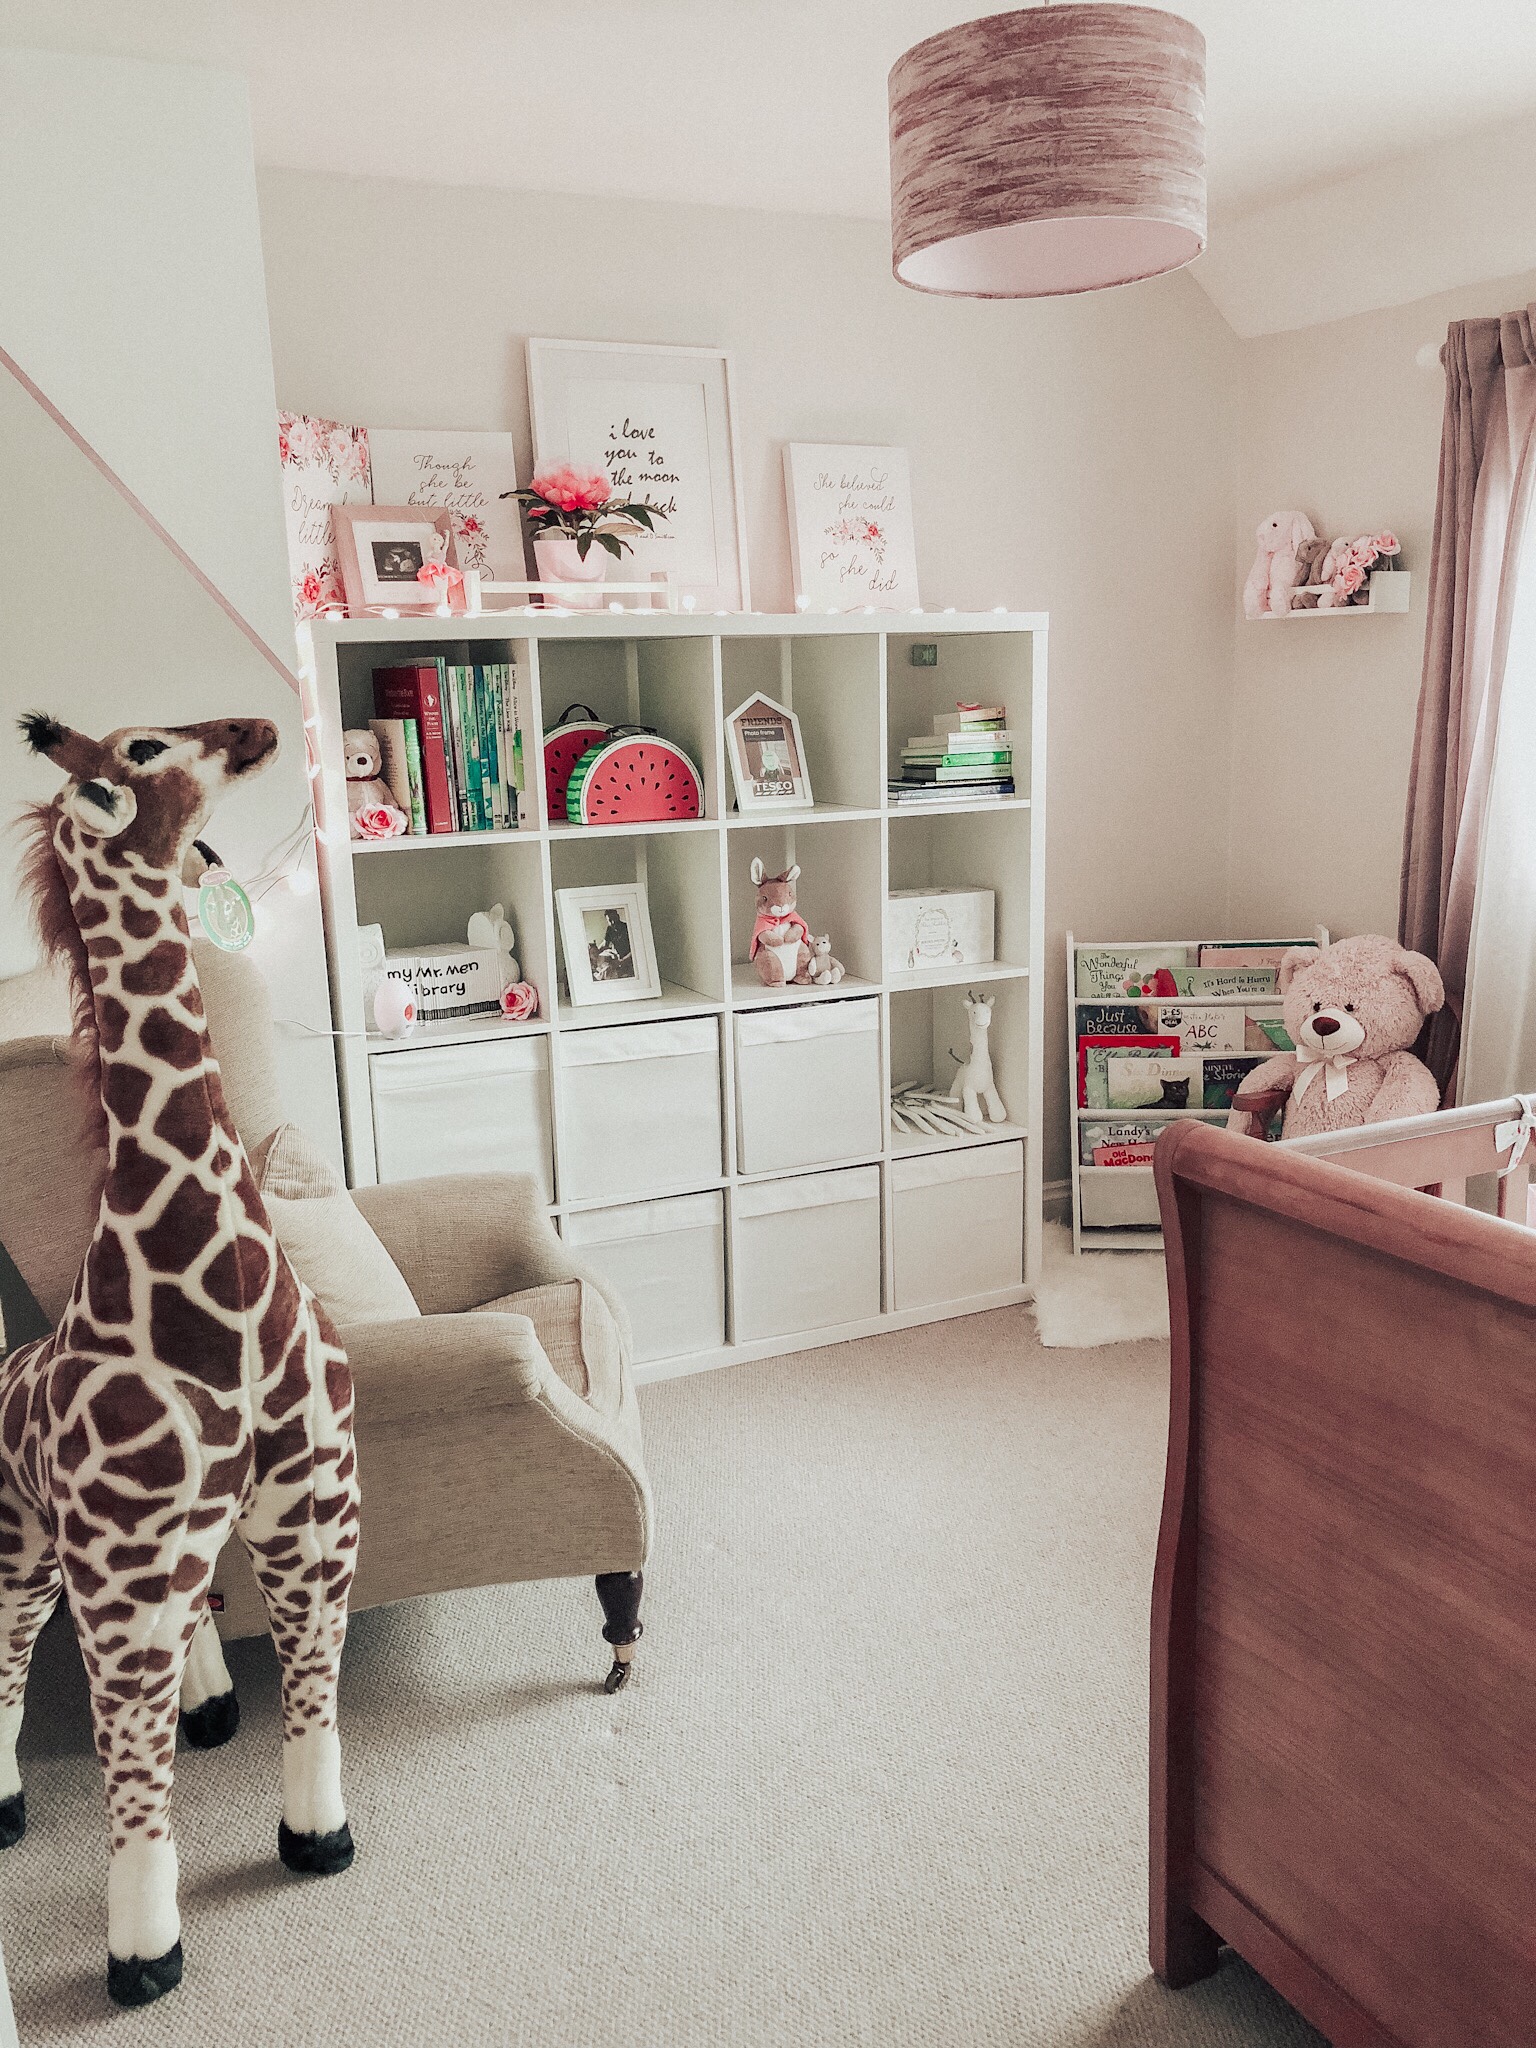
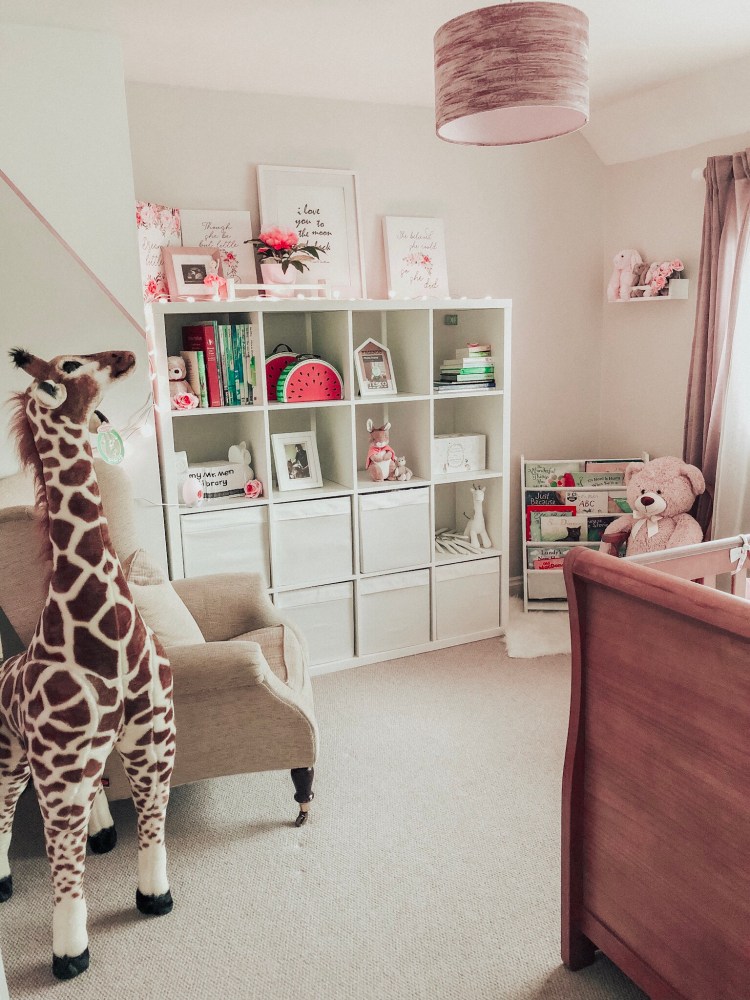
The brief I set myself was simple: antique rose, grey, and white. Classic with a hint of modern and unusual.

Creating a feature corner
Whilst Clara’s room looked pretty, it was missing something. But adding a wow was the last thing on my mind – Clara had come home on parental nutrition (intravenous feeding via her heart for those new to our journey). Suddenly her room had to be pretty, but practical. She had a lot of medical equipment in her room we needed to facilitate first and foremost.
My inspiration for a feature wall came from the need to keep Clara sidetracked whilst we carried out her lengthy sterile procedures, twice a day. She was interested in what we were doing – but she wasn’t allowed to touch the sterile one of us, and she didn’t like being restrained by the other. We needed something for her to look at, a distraction. A feature wall. As a result, the feature wall was originally intended for the wall Clara’s cot is against but as it turns out we didn’t need that for long!
The materials
- Step ladder
- Pencil
- A large spirit level or ruler
- Frog tape for delicate surfaces (invest in the good stuff, it’s SO worth it over normal masking tape)
- One paint brush per colour required
- Your chosen paint colours (0.35 litres did two coats of the largest triangle, the pink)
- Sheets to protect the floor
- Decorative ‘washi’ style tape if required for a thin dividing border
The method
- Prep your space: dust, hoover, fill any holes and sand back to a flat surface
- Protect your floor – I bought a clear sheet for a few pounds as our painting sheets weren’t accessible somewhere in the loft.
- Have a design in mind: it could be three triangles like we have, or a number of geometric shapes. Use Instagram or Pinterest for inspiration if you’re not sure! I knew I wanted to go onto the next wall so it looked more three dimensional than three triangles.
- Using a pencil and a spirit level, draw your lines on the wall. I didn’t want three exact triangles so we specifically didn’t do ours corner to corner. I knew I wanted the feature colour to be the dusky rose pink, and I wanted to have grey and white in almost equal proportion. The benefit to using a pencil is you can keep drawing until you get it right – just make it clear which your final chosen set of lines are! Stand back, look, take a photo, review, and tweak if need be.
- Now, time for the masking tape. We taped in a way that meant the colours would meet. I taped along the pencil line, and then retaped later on when I painted the second coat (more on that soon). If you want to just tape once, you can leave the tape down and you’ll end up with a border in between each colour (the width of the tape) the colour of the original wall. This didn’t work for us as the grey triangle was also the base colour.
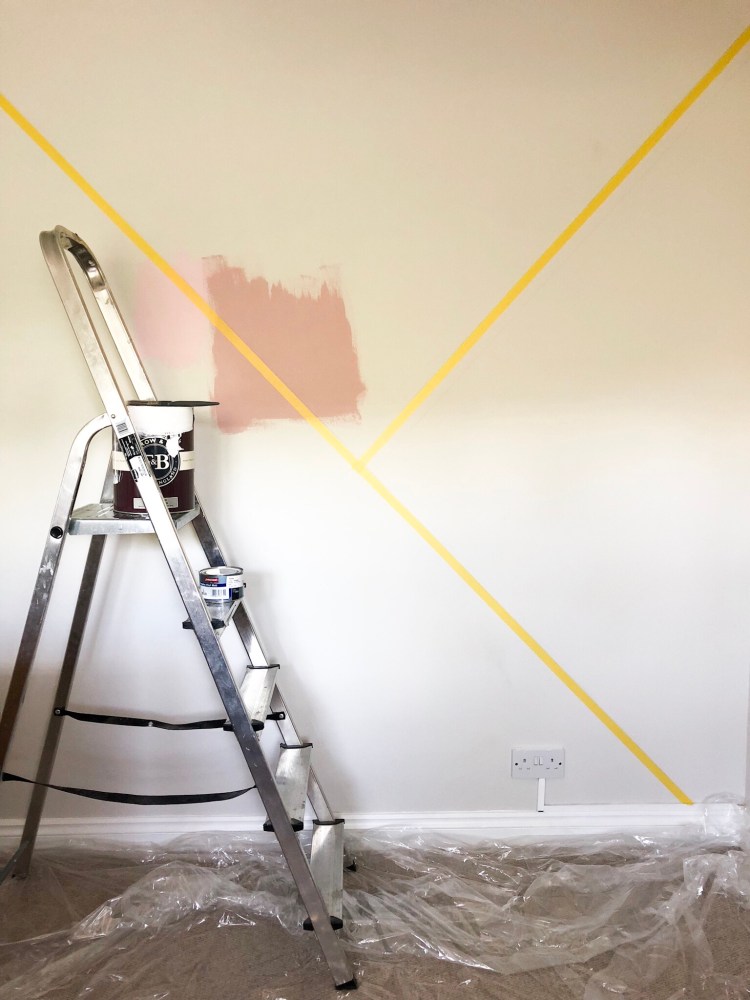
- Once your lines are masked, it’s time to paint. We kept the right hand triangle the original colour shown here so this didn’t need any painting. The top triangle we painted white, and the bottom we painted in dusky pink. Choose your first triangle to paint, and get going. You can roller or paint with a brush. Paint right up to and just onto the tape. You can also paint the next triangles immediately after this if you wish.
- Remove the tape whilst the paint is wet otherwise it may pull some of the fresh paint off, ruining your neat lines. This left a grey border in between the pink and white triangles which we didn’t want.
- Once the paint is dry, leave it 48 hours longer if you want the colours to meet without a border, then retape the wall on the triangle that’s already the correct size. For us this meant taping onto and up to the edge of the pink triangle so we could repaint the white triangle and fill in the grey border that had appeared.
- To apply a second coat, repaint your triangles. If your paint is a good quality, you might be able to get away with not retaping but hand painting close to, but not up to, the edge of the colour. I find cutting in therapeutic so this was one of my favourite bits! This is how our wall looked at this stage:
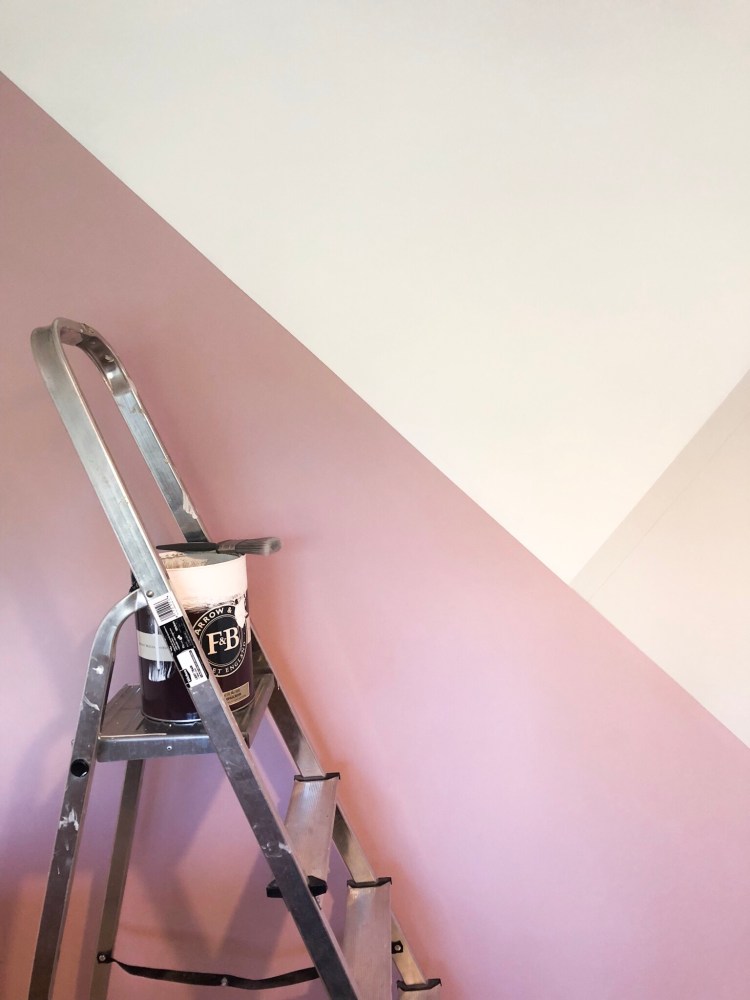
- You can either leave your wall like this, or you could add a thin decorative border like we have. To make the wall really pop, I used a thin metallic rose gold washi tape to define the edges of each colour. I simply stuck it down in the top left corner and smoothed it along the paint line to the bottom edge where I then trimmed it to the skirting. I then did the same along the grey paint lines.
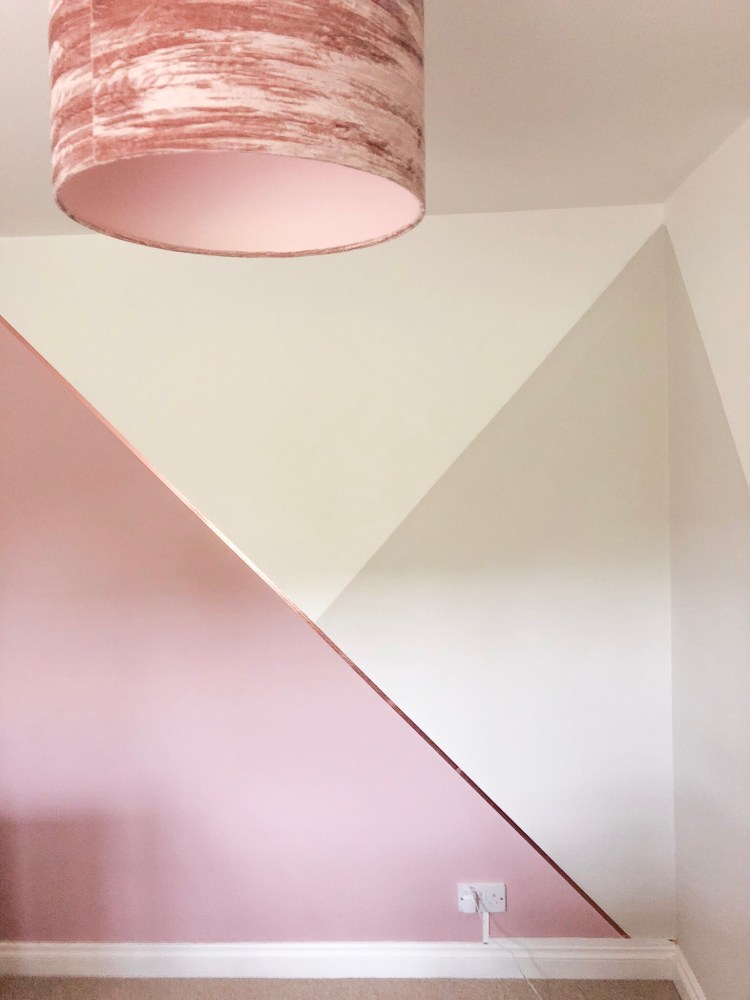
- This is what you’ll end up with:
Specific colour materials we used
- Johnstones Rose Stain pink paint – mixed to order from their colour chart and kindly gifted to us for Clara’s room by the lovely Philly from Bunnings UK, Bicester store.
- Laura Ashley Pale Dove Grey paint
- Farrow and Ball Old White paint
- Rose Gold Foil Washi Masking Tape
(affiliate link)
The Johnstones paint provided the best coverage by far – even one coat might have been enough. I highly recommend this brand, over the other two, and it would be my first choice of paint manufacturer again in future. We already had the other two brands of paint in the garage so it made sense to use the open tins we had
This feature is absolutely an effect you could achieve in a weekend.

Absolutely beautiful dear ones fit for a princess!
LikeLike
Thank you 💕💕
LikeLike